A leaking or stiff faucet is one of the most common issues in plumbing systems. In most cases, the root cause is a worn or damaged faucet cartridge. If you are searching for how to fix a leaking faucet or faucet cartridge replacement, the problem is usually located inside the cartridge rather than the faucet body itself.
Replacing the cartridge is often the most effective way to restore smooth water control and stop leakage without replacing the entire faucet. However, proper replacement requires understanding how the cartridge works, why it fails, and how system conditions affect its performance.
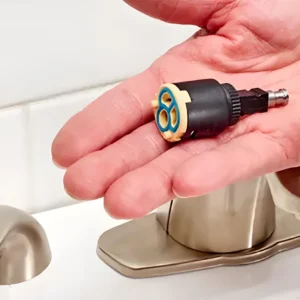
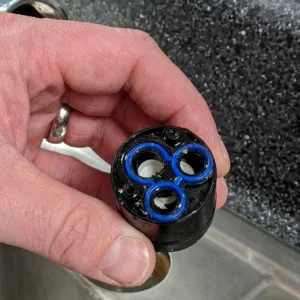
A faucet cartridge is the internal control component inside a faucet or mixer that regulates water flow and temperature. It acts as the precision interface between the user and the plumbing system.
Most modern faucets use ceramic disc cartridges, where two ultra-flat ceramic surfaces slide against each other to control water passage. This design allows precise flow control, smooth operation, and long service life under normal conditions.
Because the cartridge sits at the final control stage, it is highly sensitive to water quality, pressure stability, and installation accuracy. Even small contamination or surface wear can directly lead to leakage or stiffness.
In simple terms, the faucet cartridge is the “precision control core” of a faucet system.
If you are not sure whether the problem comes from the cartridge, there are several clear indicators.
A cartridge is most likely the issue when leakage continues even after the faucet is fully closed, or when the handle becomes stiff or uneven during operation. In some cases, temperature control becomes unstable even though water pressure remains normal.
If only one faucet is affected while others work normally, the issue is usually inside the cartridge rather than the entire plumbing system. However, if multiple outlets show pressure instability or low flow, the problem may come from upstream valves or piping conditions.
Before starting a faucet cartridge replacement, it is important to prepare the basic tools and ensure the system is safely isolated. In most standard faucet systems, the required tools are simple and do not involve specialized equipment.
A typical replacement process usually requires a screwdriver for handle removal, an adjustable wrench or spanner for loosening retaining components, and a soft cloth to protect the faucet surface during disassembly. In some cases, penetrating lubricant may be helpful if mineral buildup has caused the cartridge or retaining nut to stick inside the valve body.
In addition to tools, ensuring the water supply is completely shut off is essential before any disassembly begins. This prevents pressure release during operation and avoids potential damage or water leakage during maintenance.
Having the correct replacement cartridge ready before disassembly is also important, since different faucet systems may use different cartridge dimensions, structures, or sealing designs.
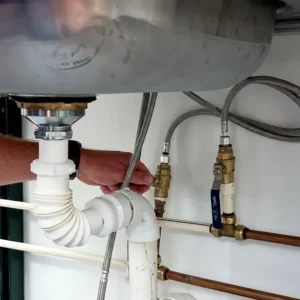
Before any disassembly, the water supply must be completely shut off using the isolation valve under the sink or main supply line. Once closed, open the faucet to release any remaining pressure inside the system. This prevents unexpected water spray during disassembly and ensures safe operation.
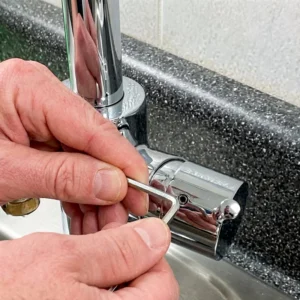
Locate the fixing screw on the faucet handle. In most designs, it is hidden under a cap or positioned at the rear of the handle. Use a hex key (Allen wrench) or small screwdriver to loosen the screw. Once released, gently pull the handle upward or outward.
If the handle is stuck due to mineral buildup, apply slight rotational movement while pulling. Avoid using excessive force, as this may damage the internal stem or misalign the cartridge interface.
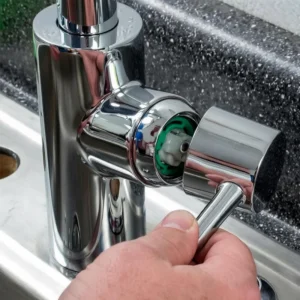
After removing the handle, the cartridge retaining structure will be exposed. This may be a locking nut, threaded collar, or metal clip depending on the faucet design.
Use an adjustable wrench or spanner to turn the retaining nut counterclockwise. For clip-based systems, use a flat screwdriver to carefully lift the clip without bending it.
It is recommended to keep all small retaining parts in a safe place, as some faucet designs reuse these components during reassembly.
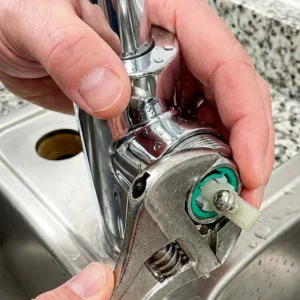
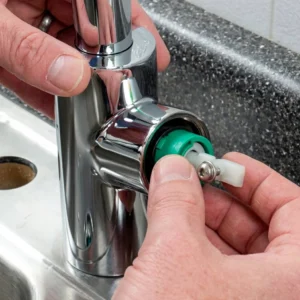
Once the retaining structure is removed, gently pull the cartridge out of the valve body. If resistance is present, it is usually caused by mineral scaling or long-term compression sealing.
In this case, apply controlled side-to-side movement while pulling upward. Do not use metal tools directly on the ceramic surface, as this may damage the valve housing or sealing interface.
After removal, the old cartridge should be discarded, as ceramic wear or seal fatigue cannot be repaired.
Before installing the new cartridge, carefully inspect the internal chamber of the valve body. Check for debris, sand particles, scale buildup, or corrosion residues.
Use a soft cloth or non-abrasive cleaning tool to remove all contaminants. This step is critical because leftover particles can damage the new cartridge immediately after installation, leading to early leakage or stiffness.
Insert the new cartridge into the valve body by aligning it with the locating grooves or positioning pins. Correct orientation is essential to ensure proper flow direction and handle operation.
Once fully seated, reinstall the retaining nut or clip. Tighten it firmly using a wrench or screwdriver, but avoid over-tightening, as excessive force may deform internal components and affect long-term sealing performance.
Place the faucet handle back onto the cartridge stem and align it properly. Tighten the fixing screw using a hex key or screwdriver until the handle is securely fixed.
Check the handle movement to ensure smooth rotation without resistance or misalignment.
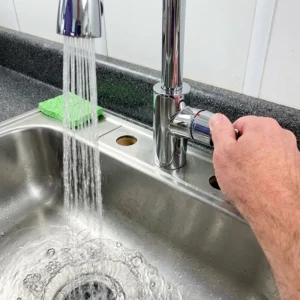
Slowly reopen the water supply to allow gradual pressure stabilization. Test both hot and cold water functions, checking for smooth operation, stable flow control, and complete shut-off without dripping.
If minor irregularities appear initially, they are usually caused by trapped air in the system and will disappear after short use.
If leakage continues, the issue may be related to valve body wear, debris inside the system, or unstable water pressure rather than the cartridge itself.
In some cases, replacing the cartridge does not fully solve the issue. This usually happens when system conditions are not addressed.
Hard water continues to create scaling. Pressure fluctuations keep stressing internal components. Debris inside the pipeline can damage sealing surfaces immediately after installation.
This is why faucet cartridge replacement should always be considered part of a system-level diagnosis rather than a standalone repair action.
If cartridges fail repeatedly, the issue may be compatibility with the operating environment. Higher-quality ceramic disc cartridges with improved surface finishing and better sealing materials can significantly extend lifespan.
In OEM applications, selecting cartridges based on real water conditions, pressure range, and usage frequency is essential for reducing maintenance costs.
At Jekare, cartridge systems are designed for real-world operating environments, not only laboratory conditions. Related solutions such as ceramic disc cartridges for high-cycle durability, thermostatic cartridges for temperature stability, and OEM custom valve systems are engineered to ensure consistent performance across different global water conditions.
If a faucet continues to leak after cartridge replacement, the issue is often caused by debris inside the valve body, improper installation, or damage to the sealing surface. System pressure instability can also lead to persistent leakage.
The most effective way is to identify whether the issue comes from the cartridge or the valve system. In most cases, replacing the cartridge solves the problem, but the system should also be checked for debris and pressure issues.
A high-quality faucet cartridge typically lasts 5 to 10 years under normal conditions. Hard water, chlorine, and unstable pressure can significantly shorten its lifespan.
Yes. Cartridge replacement is a mechanical process that can be done with basic tools. However, correct cartridge identification and proper installation alignment are critical to avoid leakage.
Early failure is usually caused by poor water quality, pressure spikes, debris contamination, low-grade materials, or incorrect installation. System conditions are often more important than the cartridge itself.
Replacing a faucet cartridge is a relatively straightforward repair process, but long-term performance depends on understanding the entire plumbing system.
A cartridge is not an isolated component—it operates within a system influenced by water quality, pressure conditions, and installation environment. Without addressing these factors, repeated failure is likely.
For both users and OEM engineers, the key is not only replacing the cartridge correctly, but also ensuring system compatibility for long-term reliability.